As a gamer, you are always in the fray of exploring something new that makes gameplay exciting and engaging. Changing clothes in “Schedule 1” is a way forward to this. But the question remains how to change clothes in Schedule 1. In this article, I shall take you through the steps involved to change Clothes in Schedule 1.
Since “Schedule 1” is a satirical game, the clothing options might be humorous, exaggerated, or tied to specific in-game actions or achievements. This allows you to have fun experimenting with the different looks. Experimenting with things like this makes the gameplay more engaging and exciting.
How to change Clothes in Schedule 1? Let us navigate through the steps you can resort to for the same. Stay tuned.
How to Change Clothes in Schedule 1?
Changing Clothes in Schedule 1 is simple and straightforward. Here is how you can change Clothes in Schedule 1 by following the steps below:
1. Access the Inventory or Character Menu
First and foremost, access the character menu and search for a button or key prompt.
It will open up your character’s inventory, profile, or a general options menu.
2. Navigate to the “Appearance” or “Clothing” Section
As you access the Menu. Go to the tab dedicated to your character’s appearance.
The tab might be named “Clothing,” “Outfit,” “Customize,” or something similar. You can use your controller’s directional buttons, analog sticks, or your keyboard’s arrow keys to go through this section.
3. Browse Available Clothing Items
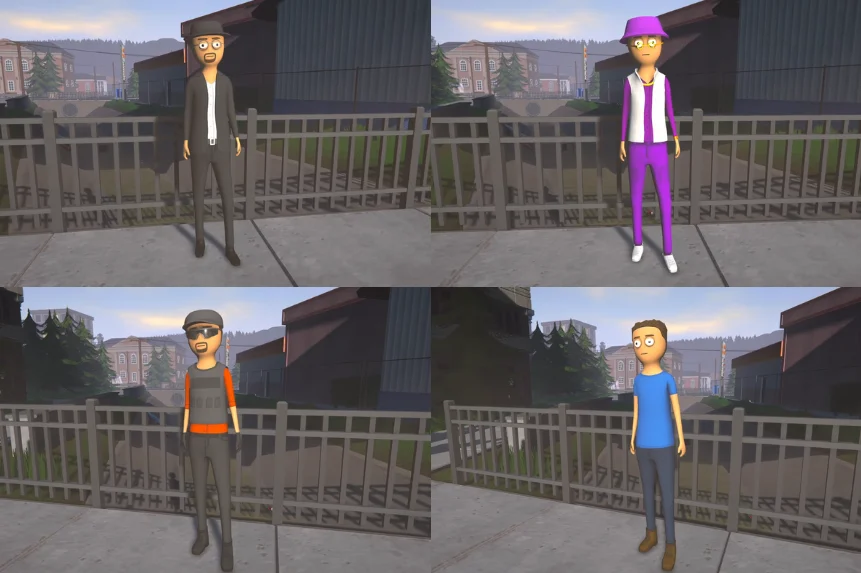
There is a list of different clothing items. You can acquire the costume of your choice. This could include shirts, pants, hats, shoes, accessories, etc.
4. Select the Clothing Item You Want to Equip
You can select the clothing item from the given list of clothing by using the navigation controls to highlight the piece of clothing you want your character to wear.
Here is the list of items that you can choose from:
- Top
- Bottom
- Outerwear
- Head
- Eyes
- Hands
- Waist
- Feet
5. Equip the Item
Now, go and equip the item by tapping the button to equip the selected item. The prompt will be labeled as “Equip” or “Wear.” Once you tap it, the costume is automatically applied to your character. You can also drag and drop the selected clothing onto your character.
6. Confirm or Save Changes
Once you are done, confirm your changes or save your new outfit before exiting the menu. Click the “Save” button to confirm.
7. Exit the Menu
Now, check if you like the new outfit on your character. You can exit the Menu by using the “Exit Button.” You will henceforth see your character in the game world wearing new clothes that you have selected.
Also, read How to Change the Appearance of Armor & Equipment in Palworld
Wrapping Up
So, there you have it! Changing clothes in Schedule 1 is quite simple and straightforward. All you need to do is find the character or inventory menu and the appearance options and follow the steps accordingly. This article provides you with a complete guide on how to change clothes Schedule 1. Go through the article. Now get out there and strut your stuff in your fresh new look. Go and enjoy the game!